반응형

깃허브에 repository를 생성 후 소스를 push 할려고하니 아래와 같이 personal access token 오류가 발생했다.

remote: Support for password authentication was removed on August 13, 2021. Please use a personal access token instead.
remote: Please see https://github.blog/2020-12-15-token-authentication-requirements-for-git-operations/ for more information.
fatal: unable to access 'https://github.com/dryadsoft/hello-dryadsoft.git/': The requested URL returned error: 403
검색을 해보니 8월 13일 이후로는 personal access token을 발급받아서 로그인 해야 github에 push를 할 수 있다고한다.
그럼 어떻게 personal access 토큰을 발급받고 적용하는지 한번 알아보자
1. github 사이트로 이동하여 로그인한다.
2. 우측에서 settings 메뉴를 선택한다.

3. 왼쪽하단의 Developer settings 메뉴를 클릭한다.

4. 왼쪽의 Personal access tokens 를 클릭후 오른쪽 Generate new token을 클릭한다.

5. 아래 빨간박스의 내용을 입력한다.
- - Note: 토큰을 구분 할 수 있는 명칭을 아무거나 입력한다.
- - Expiration: 토큰의 유효기간을 선택한다.(No expiration을 선택하면 유효기간이 없는 무제한 토큰이 생성된다.)
- - Select scopes에서 repo 체크박스를 선택한다.(기본적인 소스 push만을 한다면 repo만 체크해도 충분하다.)

6. 하단의 Generate token 버튼을 클릭하여 token을 생성한다.

7. 생성된 token은 잘 보관해두자. 지금 이 화면이 넘어가면 토큰값을 다시는 확인 할 수 없다. 그렇게 되면 토큰을 새로 만들어야한다.

8. personal access token 적용하기
자격 증명 관리자 -> Windows 자격증명 -> git:https://github.com 에서 비밀번호변경
- 바탕화면 왼쪽하단의 검색영역에서 자격 증명 관리자를 검색하여 클릭한다.

- Windows 자격증명을 선택한다
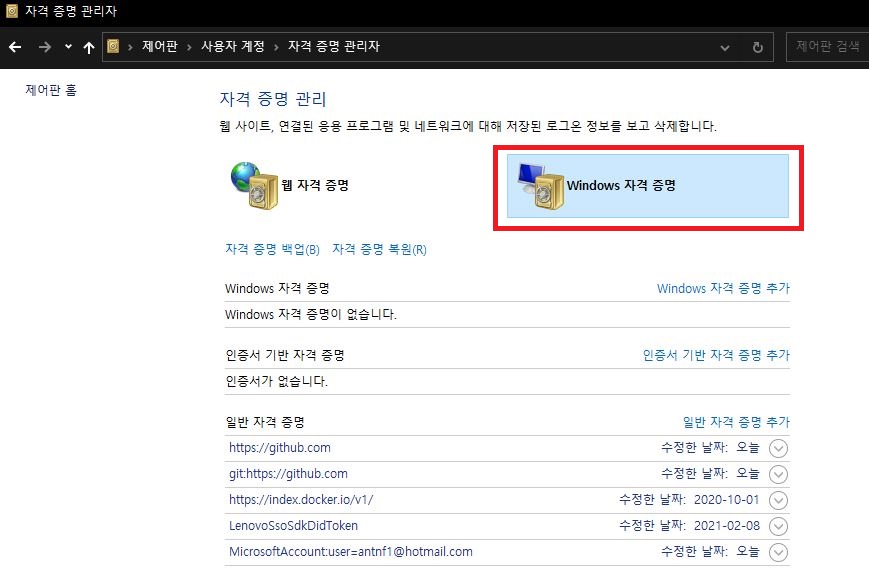
- git:https://github.com을 선택하여 편집버튼을 클릭한다.

- 위에서 발급받은 personal access token으로 암호를 변경후 저장버튼을 클릭한다.

personal access token을 발급받고 자격증명관리에서 암호를 변경해주면 github에 정상적으로 다시 push를 할 수 있게된다.
반응형
'프로그래밍 > git' 카테고리의 다른 글
| logon failed use ctrl+c to cancel basic credential prompt (0) | 2021.01.20 |
|---|---|
| Git Bash 에서 oh-My-Zsh사용하기 (1) | 2020.12.22 |
| github 멀티계정 변경하기 - ssh key (0) | 2020.12.22 |
| github 멀티계정 사용하기 - 자격증명관리자 (0) | 2020.12.22 |
| gh-pages 오류 해결방법 (0) | 2020.12.21 |


댓글